G1 JetPack 6 Flashing Guide#
1. Download Image#
Download the required files — get both the
.tarfile and the image file from Jetpack 6.2.
2. Unmount Orin NX’s NVMe#
Steps to Remove the NVMe SSD#
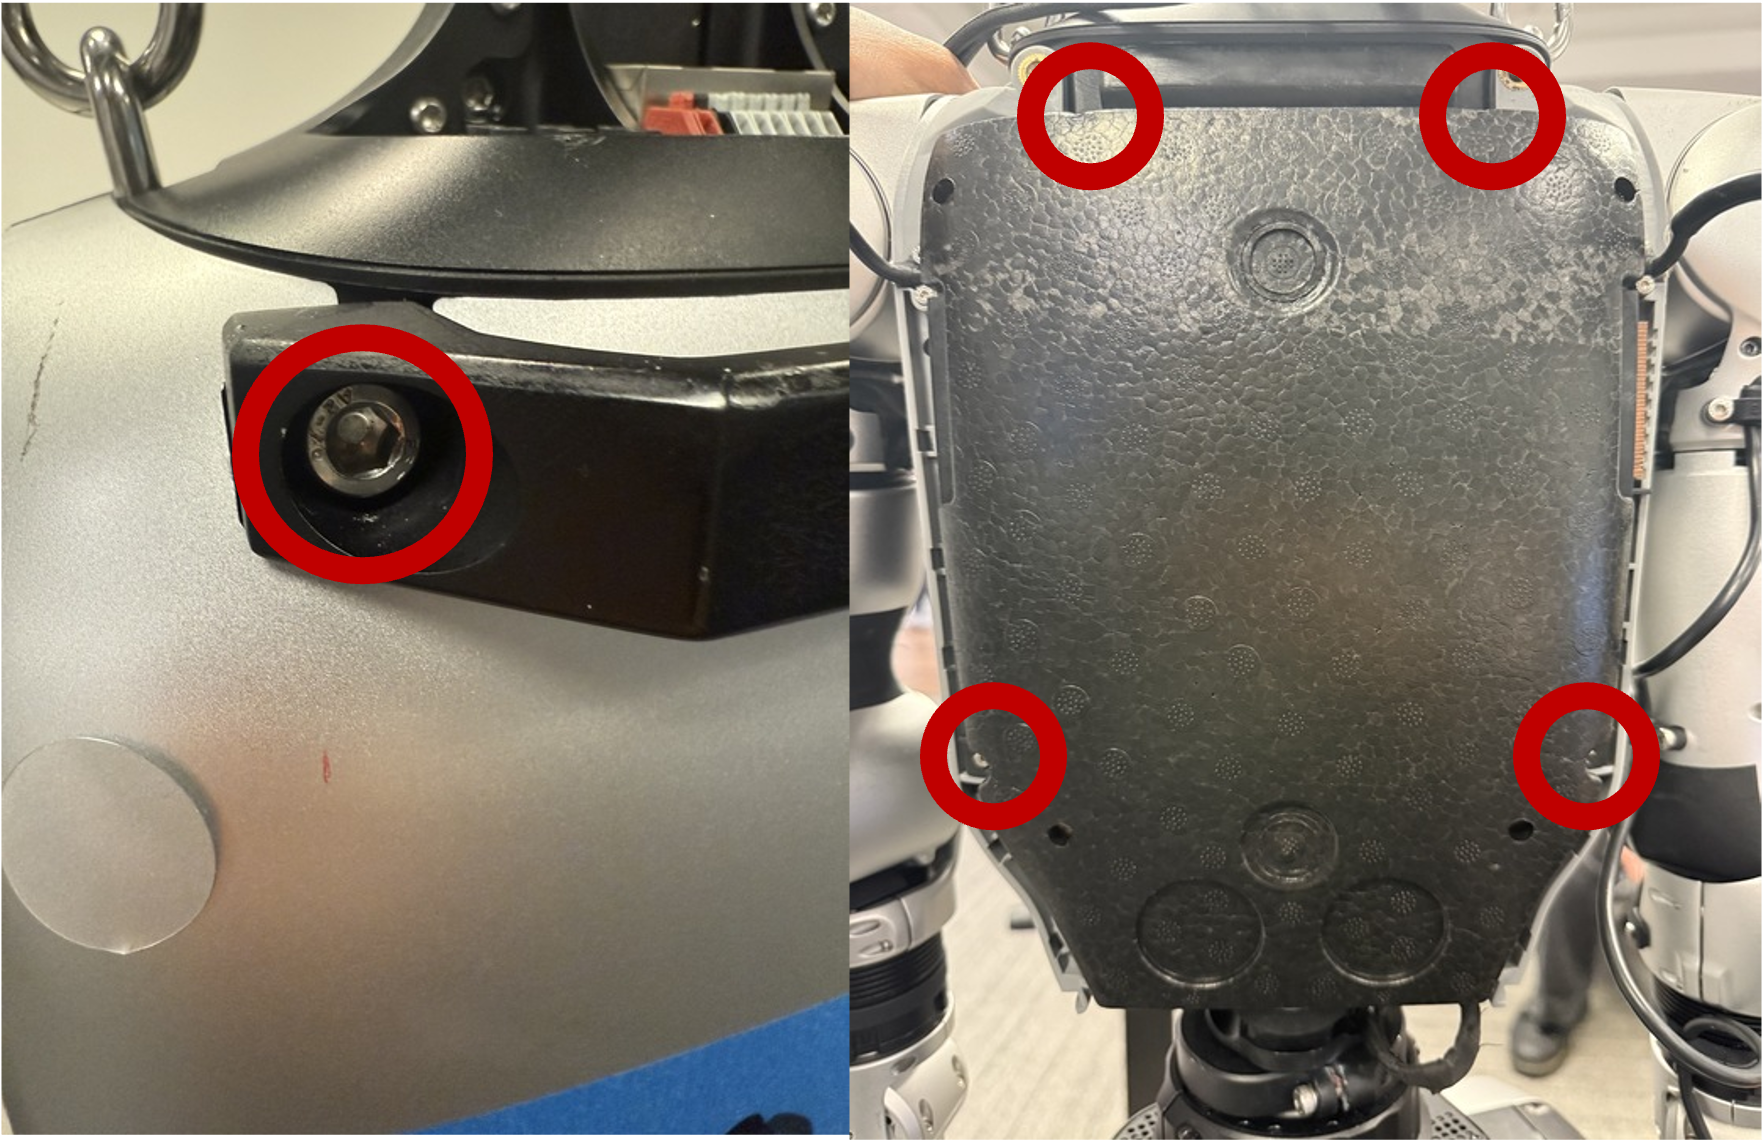
Remove the back handle screws
Use a 5 mm T-handle Allen key to unscrew the two screws located at the back of the robot near the handle.
Remove the foam and plastic back cover
Use the 2 mm hex tool from the Fanttik tool kit to remove the four screws holding the foam and plastic backing in place.
Lift the backing off to expose the internal components.
Remove the NVMe screw on the Orin NX module
Use a Phillips screwdriver (also in the Fanttik tool kit) to remove the single screw securing the Orin NX’s NVMe SSD.
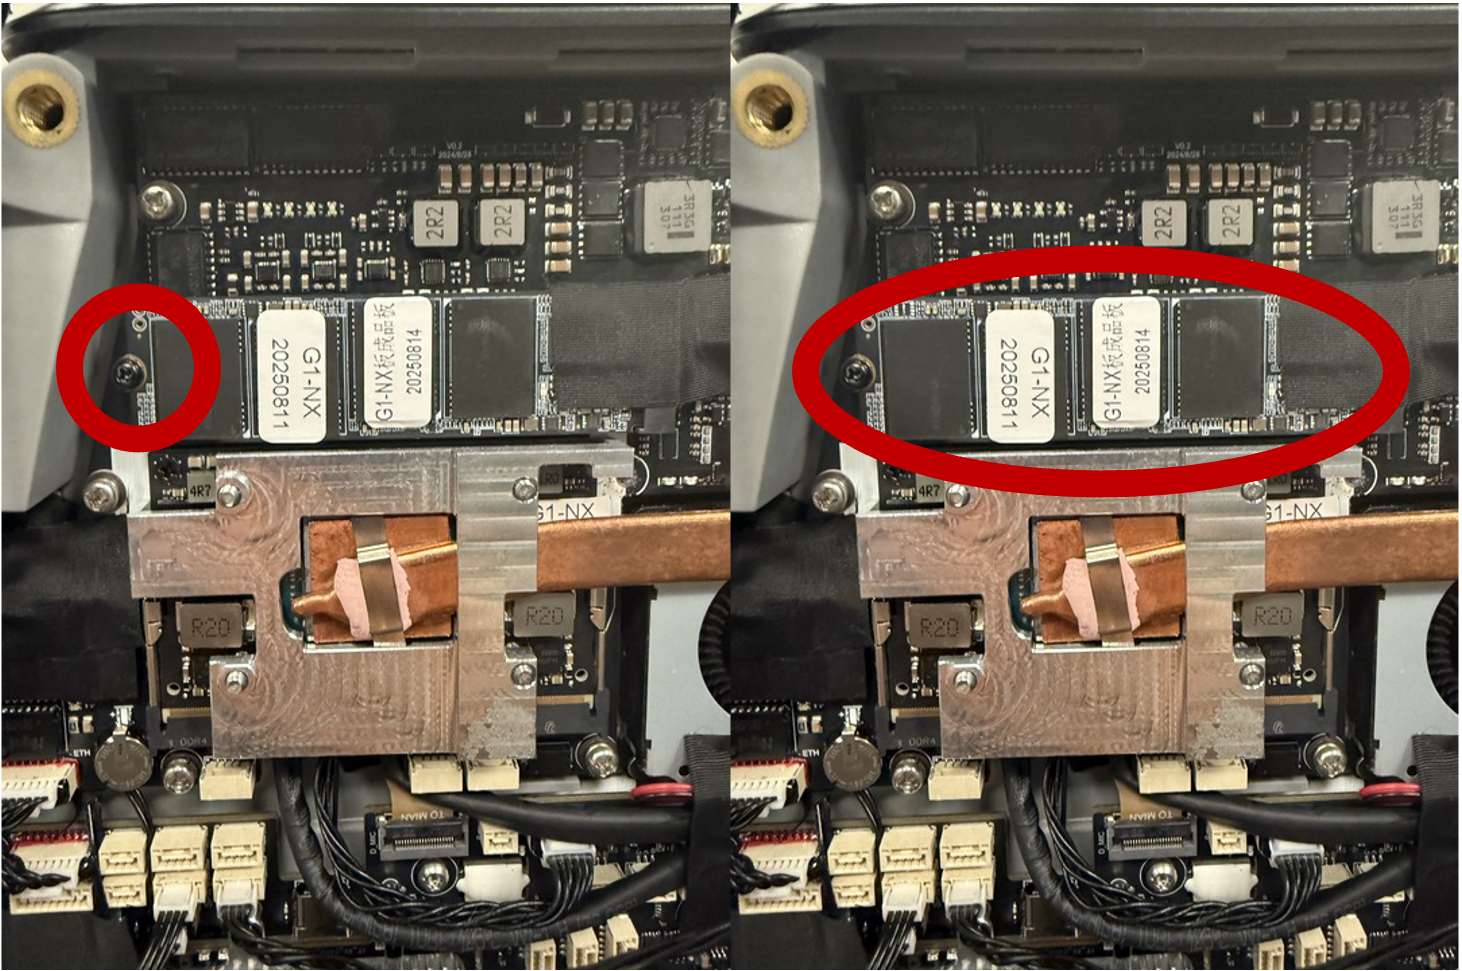
Remove the SSD card
Carefully slide out and remove the NVMe SSD from its slot.
3. Flash the NVMe SSD#
Mount the NVMe SSD from the Orin NX into the NVMe SSD enclosure adapter. (Adapter needed when burning image from a laptop)
Check that the robot’s SSD is unmounted. Run the following command to make sure the external SSD (where you will burn the image) is not mounted:
sudo umount /dev/sda*
If the SSD was mounted, this command will safely unmount it so it’s ready for imaging.
Navigate to the folder where you have the image (
cd robot_NXUpgrade/), then run the following command:
bzip2 -dc g1-nx-j6.2.img.bz2 | sudo dd of=/dev/sda bs=4M status=progress conv=fsync
After it’s done, eject the card with the following commands to safely unplug it:
sudo sync
sudo udisksctl power-off -b /dev/sda
Set the SSD card to the side and proceed with the second part of the flashing process!
4. Put the Robot Into Flashing Mode#
Power on the G1 and wait until all three power indicator lights remain steadily lit.
Connect the robot to your laptop/desktop using a USB-C cable.
Press and hold both white buttons on the robot at the same time for two seconds.
While still holding them, release the top white button and continue holding the bottom button for 2 seconds until the three green lights change to two green lights.
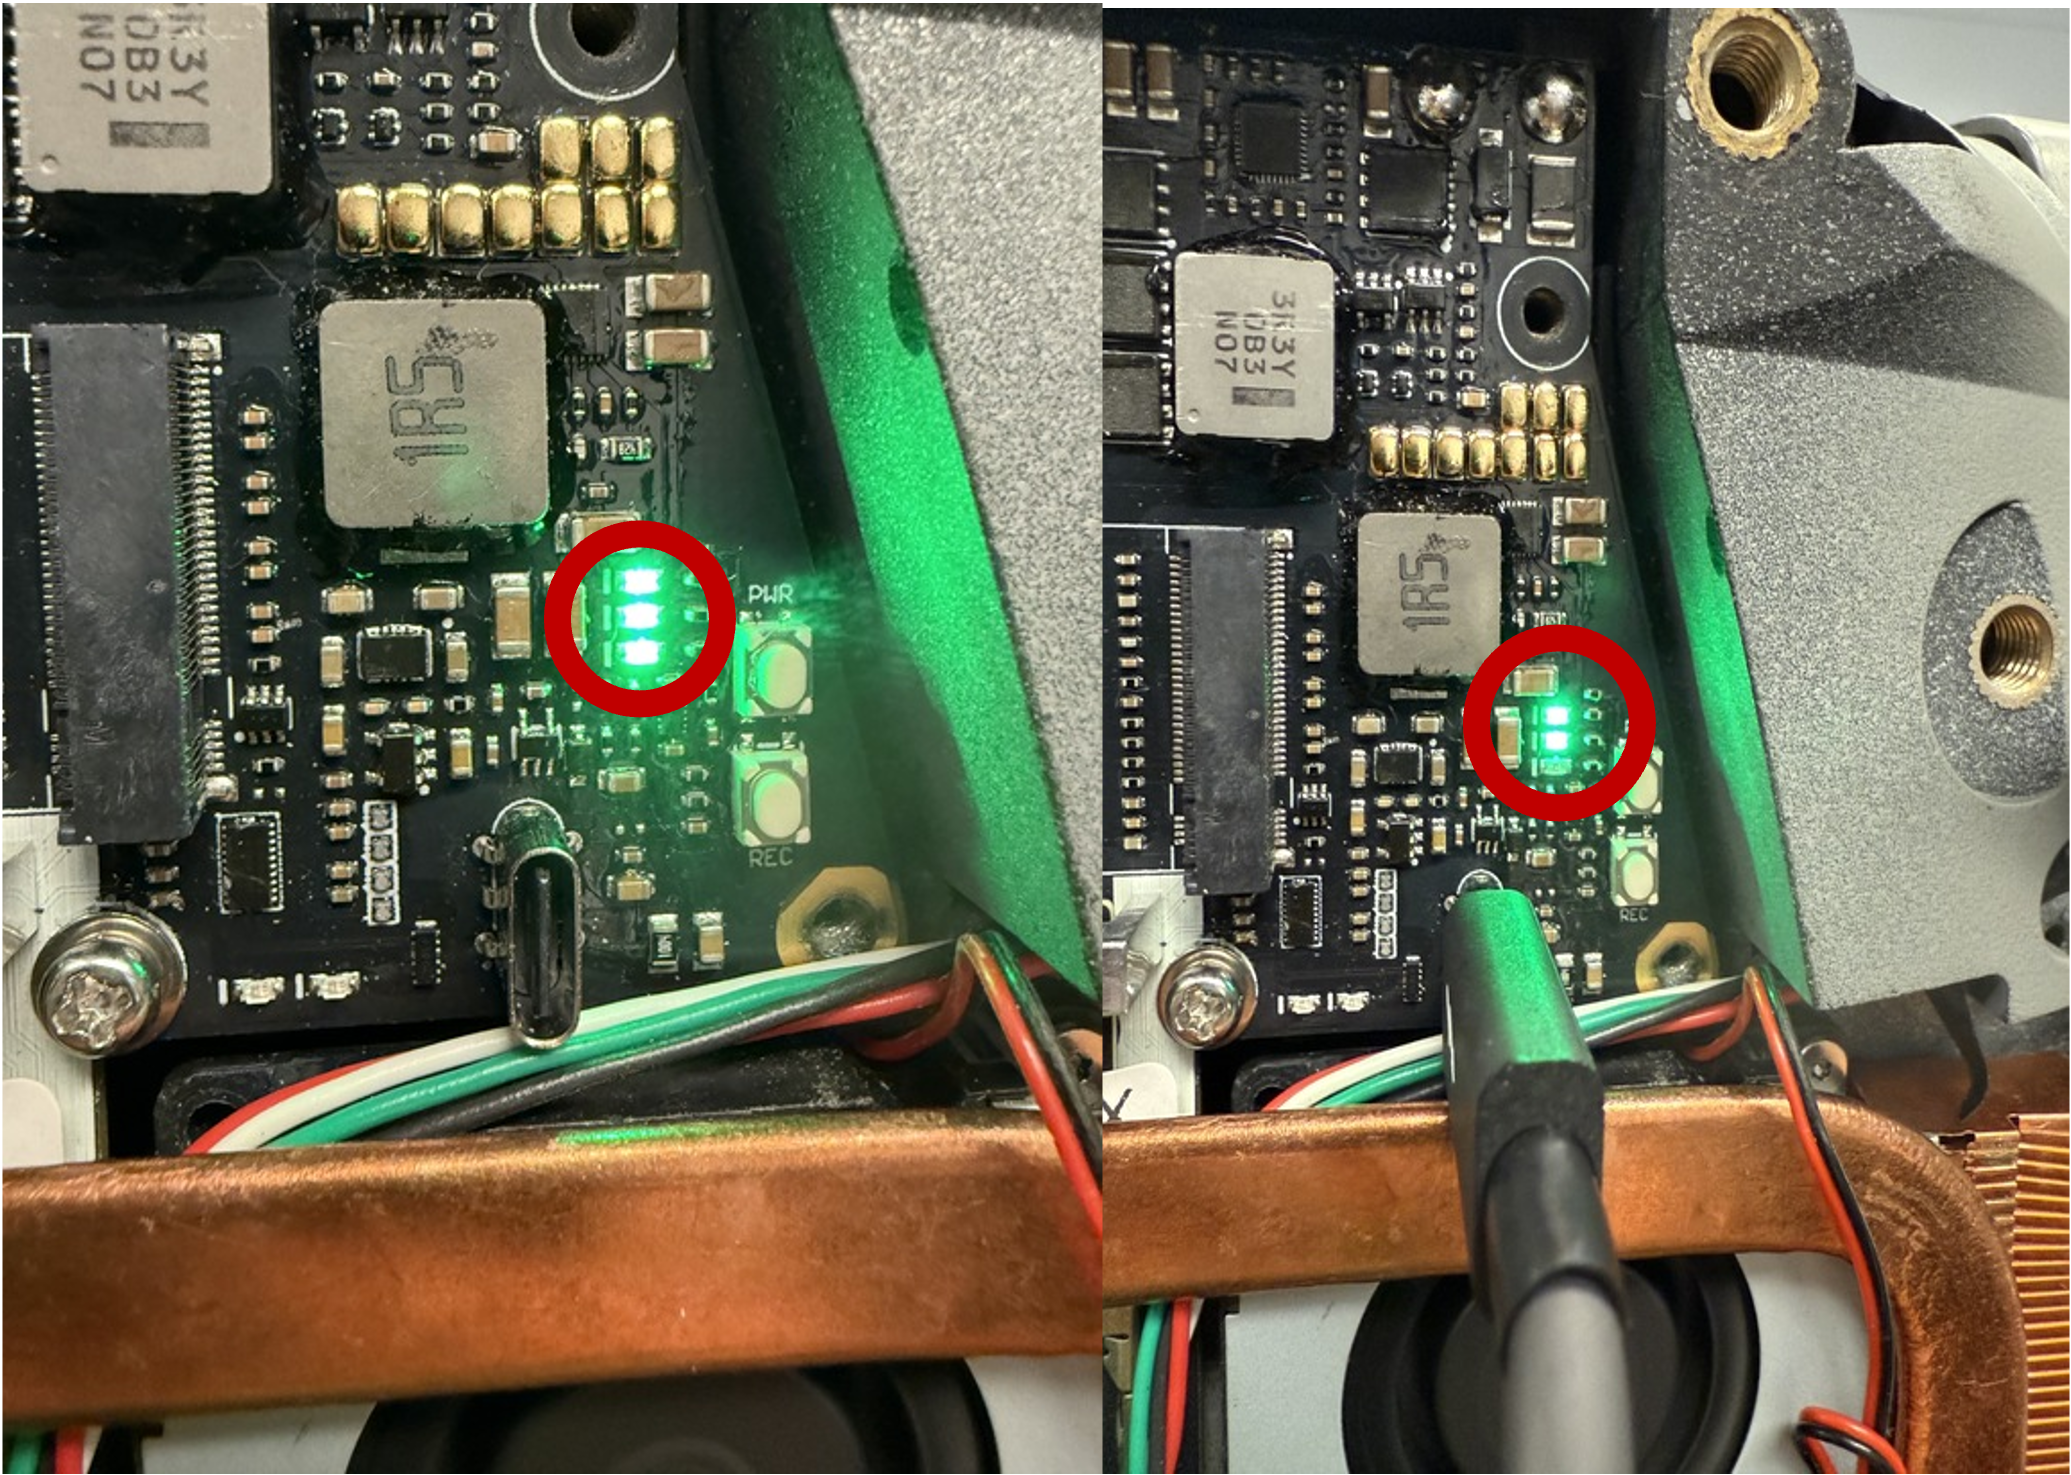
When only two lights are on, the robot is now in flashing mode. Open a new terminal on your computer and enter
lsusb. You should see text containingNVIDIA Corp. APX.You can now proceed to run the following commands:
sudo tar -xjvf Jetpack_6.2_nx.tar.bz2
cd Jetpack_6.2_nx/Linux_for_Tegra
sudo ./flash_nx_module.sh
Wait patiently for about 8 minutes until it shows success.
5. Reassemble the Robot#
After the flashing is complete, power off the robot.
Reinstall the Orin NX’s NVMe SSD back into its slot on the G1 robot and secure it with its screw.
Reattach the foam and plastic backing, using the same tools you used to remove it.
Tighten all screws to ensure the back cover and handle are securely in place.
Turn on
maxnmode on Jetson Orin using the command:
sudo nvpmodel -m 0
and use
sudo jetson_clocks
sudo jetson_clocks --show
to check if it is already in Maxn model.
6. Install Required JetPack Packages#
Install the packages needed for deployment:
sudo apt-get install -y nvidia-l4t-dla-compiler libcudla-dev-12-6